 |
|
|
previous topic :: next topic |
| Author |
Message |
Nak

Since 19 May 2005
4335 Posts
Camas
Site Lackey
CGKA Member
|
 Fri Dec 19, 08 3:22 pm Making A Lineset Fri Dec 19, 08 3:22 pm Making A Lineset |
 |
|
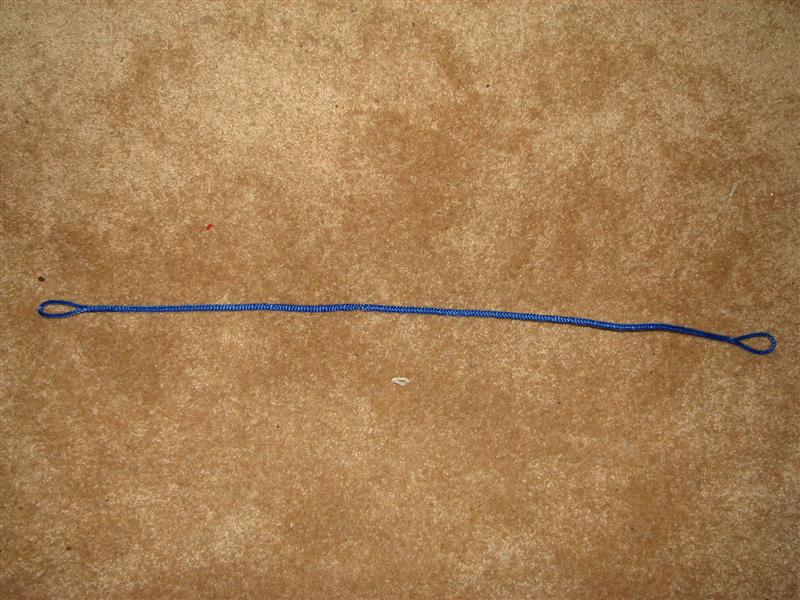
Making a Line Set.
Warning! Long damned post here! 
This is a hell of a lot easier & cheaper than most people realize. Its a lot easier to do than reading this post. A good 800# line set can cost $200 to buy; you can make one for around $60. In addition to the cost savings, youre free to choose any line length you need. Make a good line set and it should stay in tune for the life of the lines.
Im going to discuss line sets with no sleeves. Sleeves are used to prevent the thin Spectra line used in commercial line sets from cutting the pigtails & leaders theyre connected to. Well use 800# spectra to avoid this. Ive heard that some have gotten away with using 600# spectra sleeveless as well, but I havent tried that. Commercial line sets are often 450# or 500# spectra. You definitely need sleeves with lines that thin.
Going sleeveless has a lot of benefits. Done properly, by splicing an eye into the line, its the strongest line end available. Sleeveless, spliced lines are easier to make for the individual. Sleeveless, knotless, lines are far less prone to tangle. (And easier to untangle
) Some kites require sleeveless, knotless, lines for the safety system to work. For example, the Slingshot REV and T3 safeties wont work if theres a sleeve or a knot on the front lines.
Some people have asked me about Q-line. Its great stuff for a lot of uses, but not for making line sets. Why? It cant be spliced. You have to tie knots in it, and the knots dont have the best characteristics. Every Q-line knot Ive tested has a breaking strength of around 250#. While adequate, its not high enough for my likes. Also, the Q-line sets Ive tried have all had some slippage in the knots. This has the effect of requiring re-tuning the lines fairly often.
I prefer 800# spectra over the 600# stuff for a couple of reasons. First, I know for a fact that I dont need sleeves. Second, the 800# line will stay in tune better. Permanent line stretch is caused by applying a load to the line. We pre-stretch our lines by applying a certain load to the lines. As long as we dont come to near that load while riding, the line should not permanently stretch any more than it already has. The pre-stretch load with 800# line can be about 150# more than with 600# line. So, its a lot less likely that the 800# line will take an additional permanent stretch while riding.
Tools needed:
1 sharp (new) single edged razor blade.
1 piece .011 to .015 music wire bent in half. About 2 to 3 feet long. Also bend 2 of one end 90 degrees. This is your fid.
50# white spectra fishing line.
1 sewing needle that you can easily feed the 50# line into.
1 fine tipped sharpie marker.
1 36 steel rule.
Optional: Charkbait or Jerry Brown superglue. Surgical gloves.
OK, enough talking. Lets make a line set! (Ill assume that your bar is properly tuned when all 4 lines are equal length when the lines are walked out.)
Well make a 20 meter line set. There are two kinds of line sets, equal and unequal length. Some kites have front and rear lines of different lengths, some have equal lengths front to rear. Look at your bar with the lines laid out to see which you have. The REV has front lines that are a couple of feet longer than the rears. Youll easily see that the rear leaders connect to the lines a lot further up than the front.
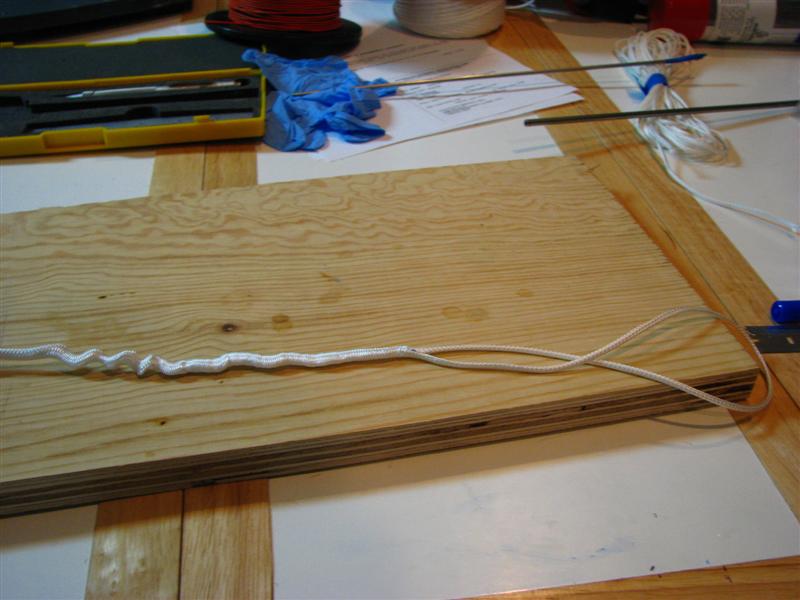
Start by cutting two lengths of Spectra, each about 44 meters long. Make one a couple of meters longer if you need unequal length lines. Splice an eye on each end of each line.
How to splice an eye.
The splice is what provides the strength to the line. The sewing just locks the eye in place during very light loads.
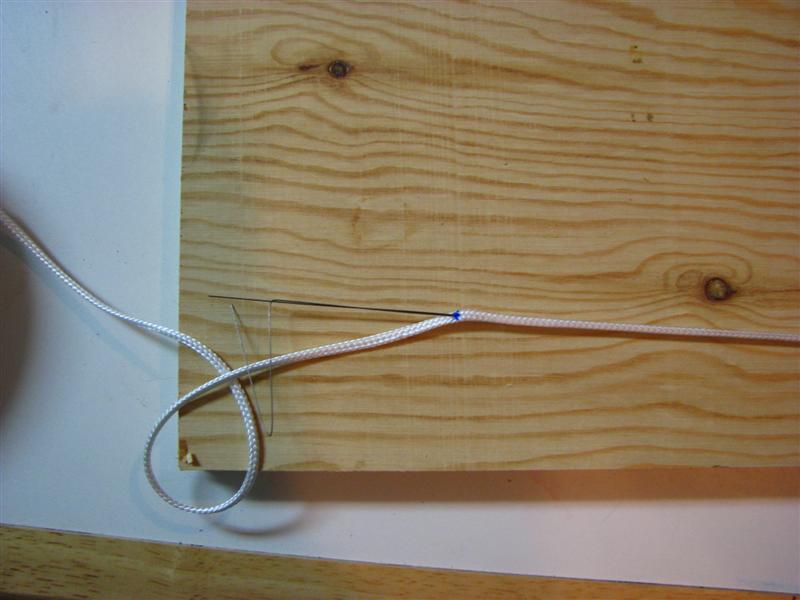
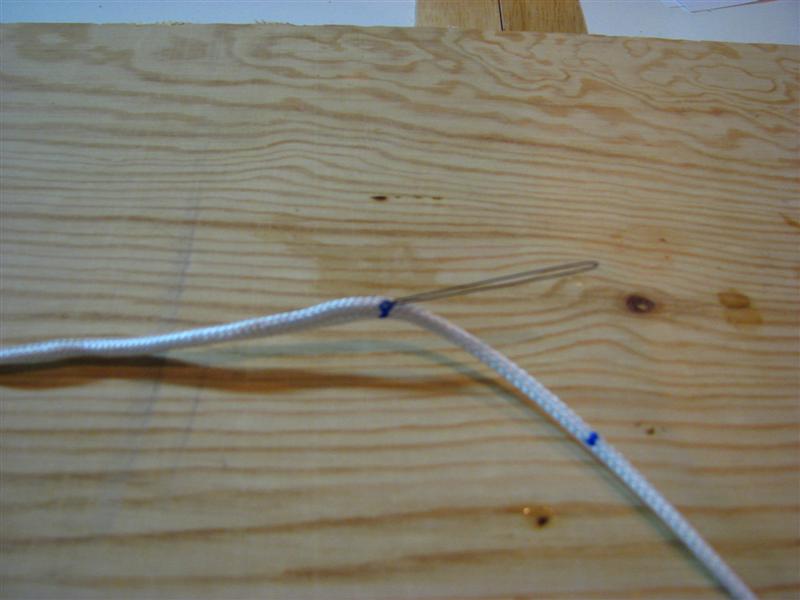
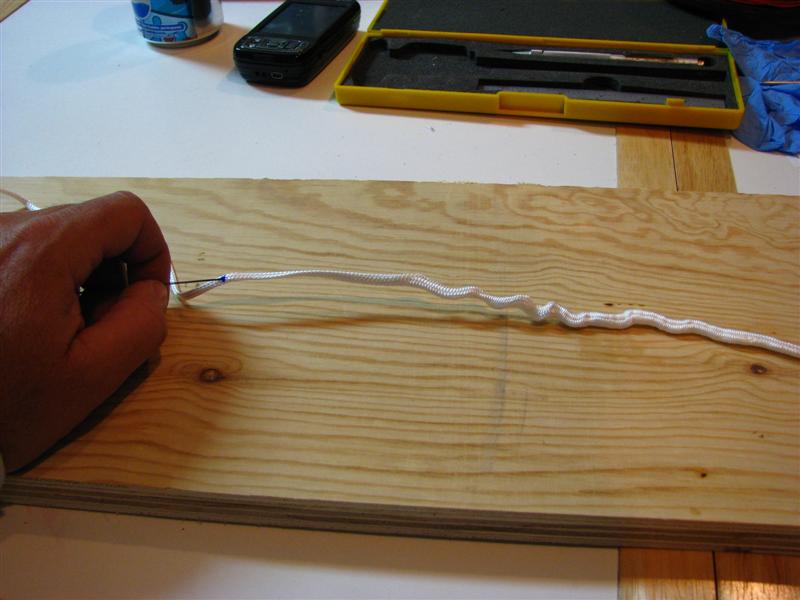
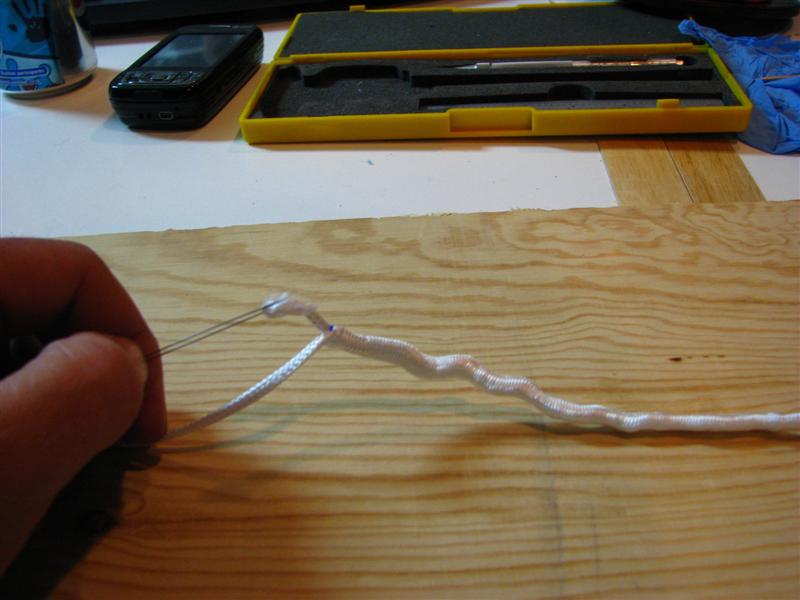
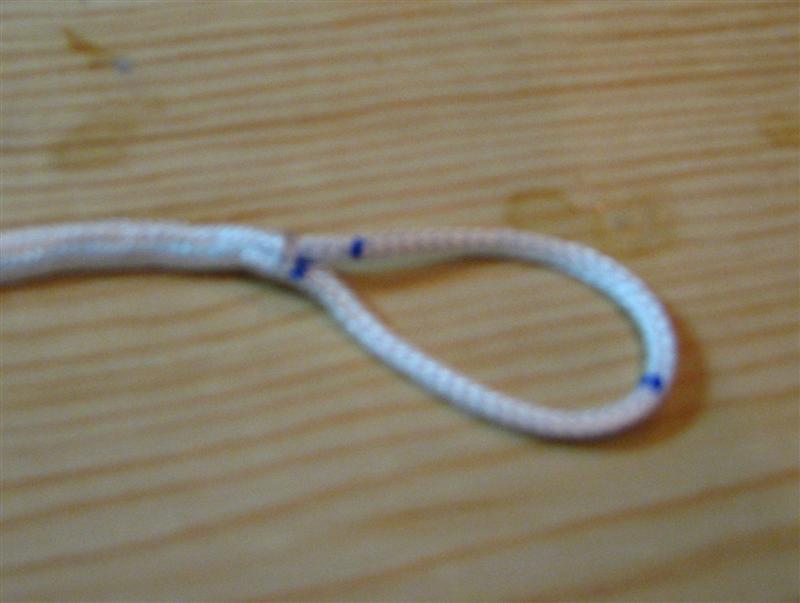
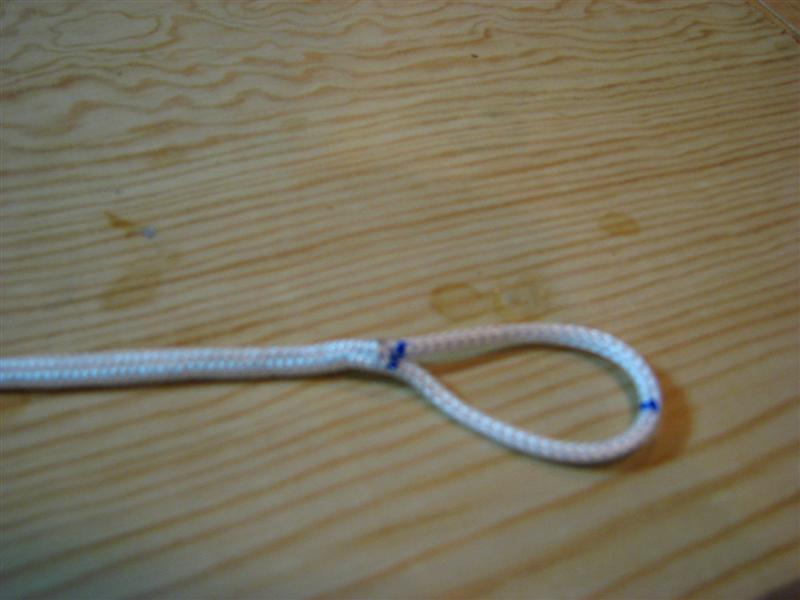
I make my splices 15 long. This is a bit of overkill, but it doesnt take any longer to do and only costs a couple of cents extra. Well worth the peace of mind. I make my eyes 1.5 long; make yours whatever length you prefer. (At least 1 inch. Some prefer 2 inches.) Mark the line 23 from the end. (Well call this point M1) Mark it again 3 from M1, about 20 from the end. (M2) Mark it again at 15 from M2, about 5 from the end. (M3) Insert the point of the fid into the line at 17.5 from M1, opposite side from M2. Insert it so it points at M1. Work the line down onto the fid until the point is at M1. Push the point so that it exits at M1. There should be about an inch or two showing at the point. Insert the end of the line into the bend of the fid with about .25 sticking through. (Any more and it will be hard to pull trough
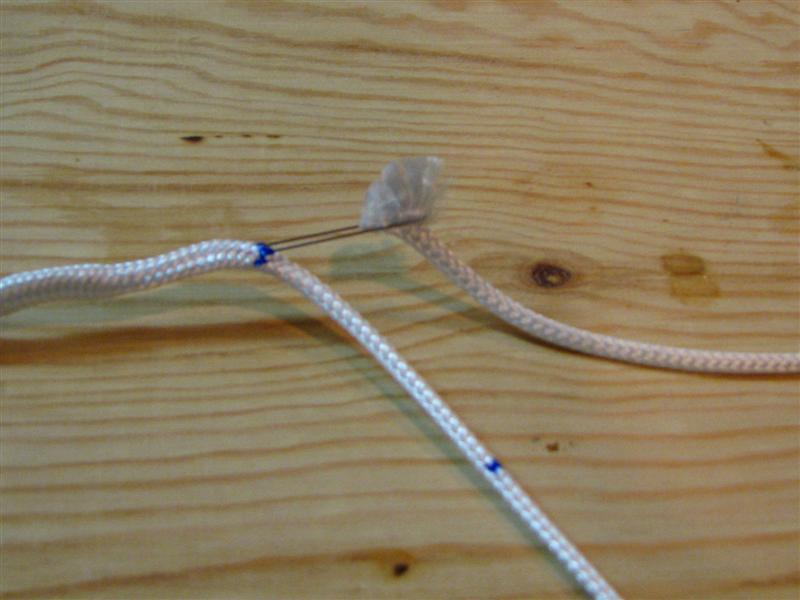
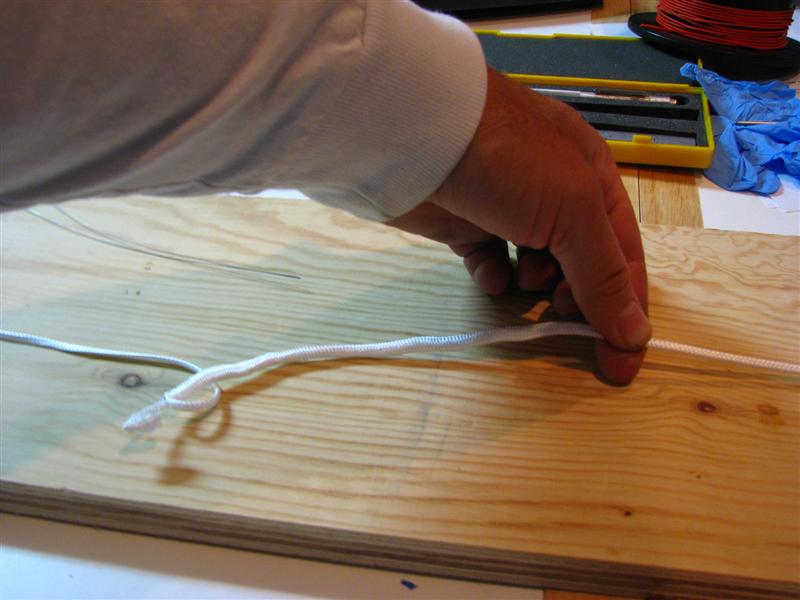
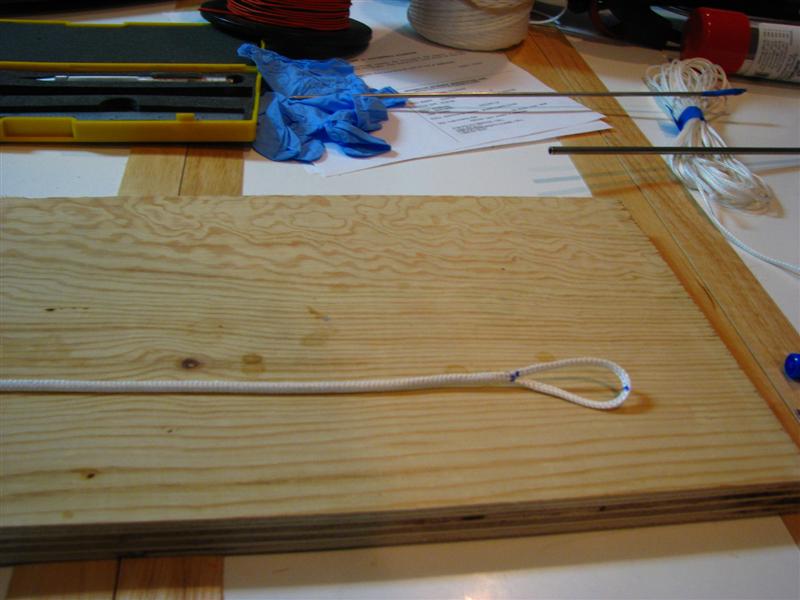
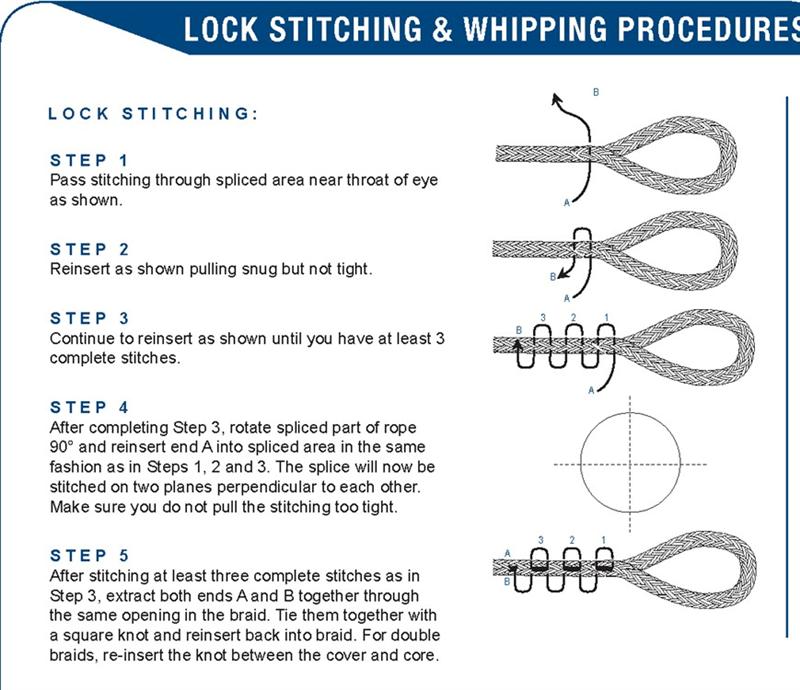
) get it nice and tight right in the point of the fid. Pull the fid back through the line. It helps if you work the line over the point rather than just pull on the fid. Pull the end of the line so that it exits with the fid. Pull the line so that M1 and M2 line up. Work out the line with your fingers to tighten it up, keeping M1 and M2 lined up. You should have a couple of inches of line sticking out where the fid entered. Leave that for now. Lock-stitch the eye now. Thread an 18 long piece of the 50# line in the needle. Start the needle in the splice about 1.5 below M1 & M2. Sew like the attached photo Lockstitch.jpg up towards the eye. The stitches should be just a little bit snug. DONT over tighten! About .5 from the eye reverse back to the beginning. Have the last stitch exit as close as possible to where the tail of the line is still sticking out. Tie a square knot with the two lines; there should be a little bit of slack here. Thread both ends through the eye of the needle. Insert the needle as close as possible to where the two lines exit, feeding the needle away from the eye. Exit the needle about an inch or two down. Pull on the two lines so that the square knot buries in the line. Pull it reasonably snug and trim the 50# line close to the main line. When you pull on the main line to tighten it, the ends of the 50# line should bury inside the main line. (Optional: use a drop of Charkbait or JB superglue on the line where the square knot is Pull really tight on the eye and the main line. I mean REALLY tight. Roll the line between thumb and forefinger, wearing surgical gloves, to keep the diameter at the glue spot as small as possible.) Now, pull the end of the 800# line we left before. Pull it out so that M3 becomes exposed. Trim the line at M3 at a 45 degree angle. Tighten up the main line and the end should bury inside the main line. Hold the eye and pull on the line, working down to the end of the splice to tighten everything up. Woo hoo! Youre done with this eye. The first time you do this itll take a while, by your fourth eye youll take about 5 minutes start to end. You might want to practice on a short piece of throw away line first
Youll notice in the photos that I have an extra mark between M1 and M2 designating the center of the eye. This mark is unnecessary and just makes measuring harder.
Stretching the lines.
OK, now we have two lines, roughly twice as long as we want them. Next step is to pre-stretch the lines. This step is CRITICAL. If you skip this step, your lines will go way out of tune every session.
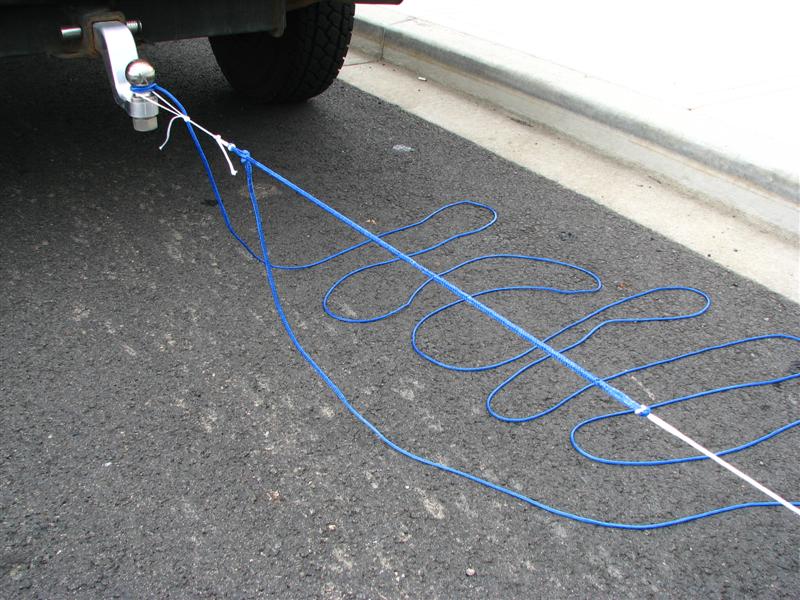
WARNING!!! This can be EXTREMELY DANGEROUS if you do it wrong!!! You could KILL or SEVERLY INJURE yourself or others!!! Were going to put a load of around 450 pounds on these lines. That is a tremendous amount of energy, much like drawing back a bow & arrow. A bow that pulls 50# is legal to hunt and kill Elk with. Were dealing with almost 10 times that pull!!! DO NOT attach anything to the line with any appreciable mass. No Carabineers, no snap shackles, no chain links. Even wet line has too much mass!!! This must be done on a bone dry day with bone dry line on a bone dry surface! A wet line could cut somebody in half. Even with these precautions, ensure that NOBODY is within a 500 yard radius during this procedure. If youre not knowledgeable and comfortable dealing with this kind of work, DONT do it. Find someone who is to help you.
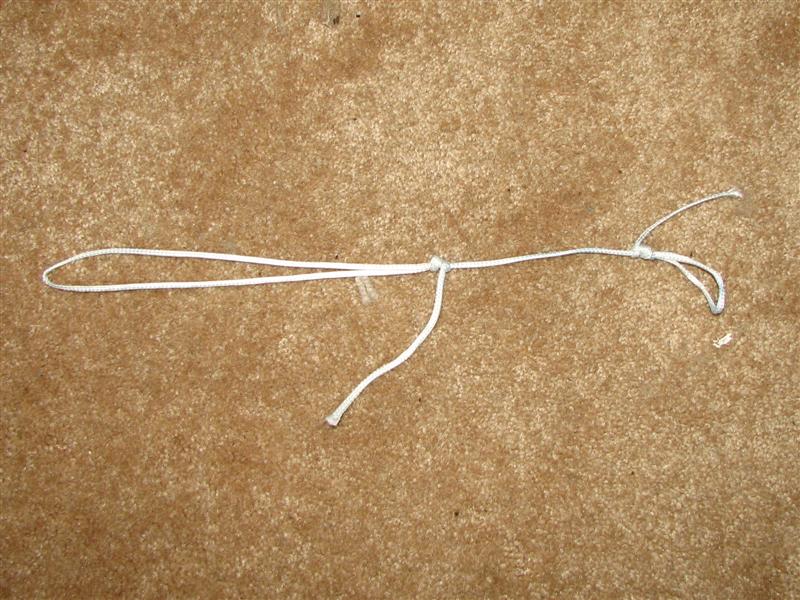
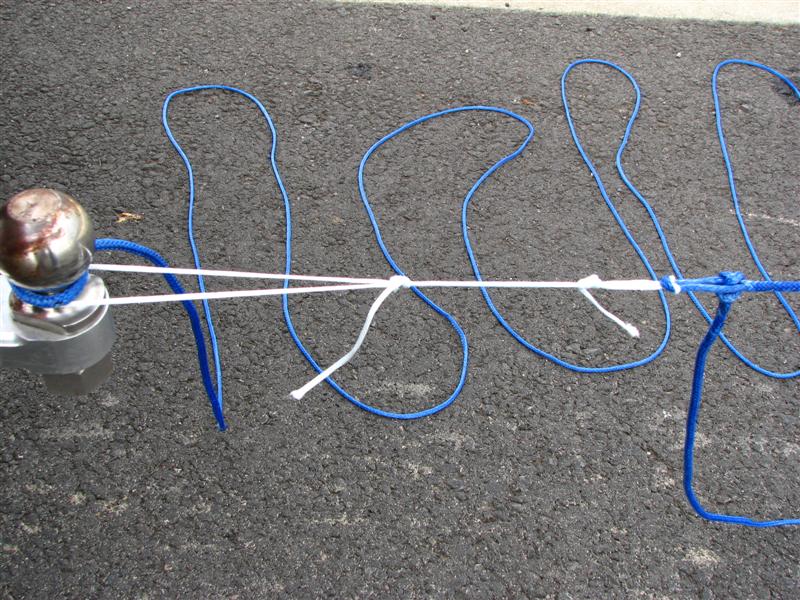
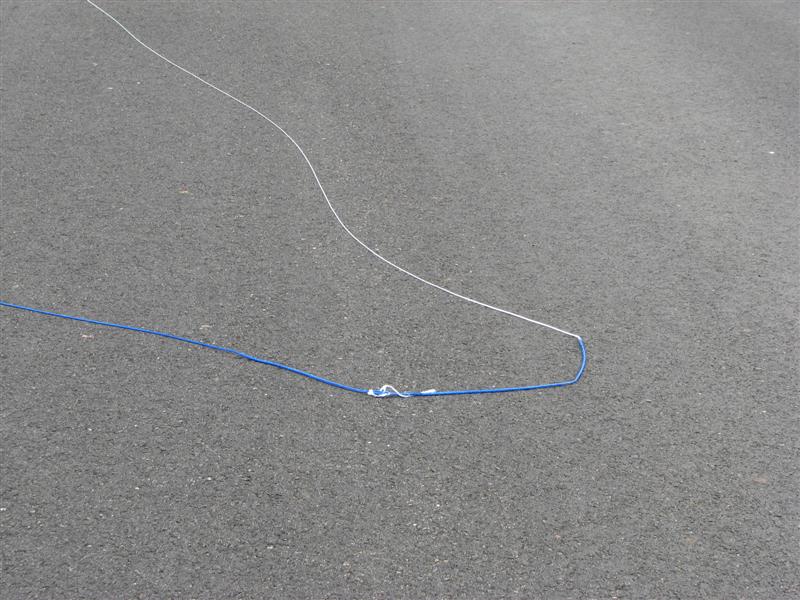
There are two ways to do this. The better way is with a 500# force gauge. Since you probably dont have one of these, I figured out a way to do it without one. Take a two foot piece of 800# spectra. Tie an overhand loop in each end, leaving an eye easily big enough to go around the ball of a trailer hitch. This is your fusible link. Take a 2 foot length of 1/8 amsteel and tie/splice an eye on each end. This is your line saver. Take 25 or 30 feet of 1/8 Amsteel. Tie an overhand loop at each end, leaving a generous eye. This is your stop line. Take a 10 foot length of 1/8 amsteel with an eye on each end. This is your Anchor line. Wrap it around a good size tree or REALLY strong post of some kind right at the base. Remember, youre betting your life that it will take a 500# load, so be sure it will take at least 3000#. Attach the anchor line to the main line. At the other end of the main line attach your line saver. Attach the other end of the line saver to the fusible link. Attach the other end of the fusible link to the trailer ball of a truck. Attach one end of the stop line to any part of the trailer hitch EXCEPT the ball. Youll see in the photos that I attached the stop line to the ball. When the fusible link broke it snapped back and shredded the stop line
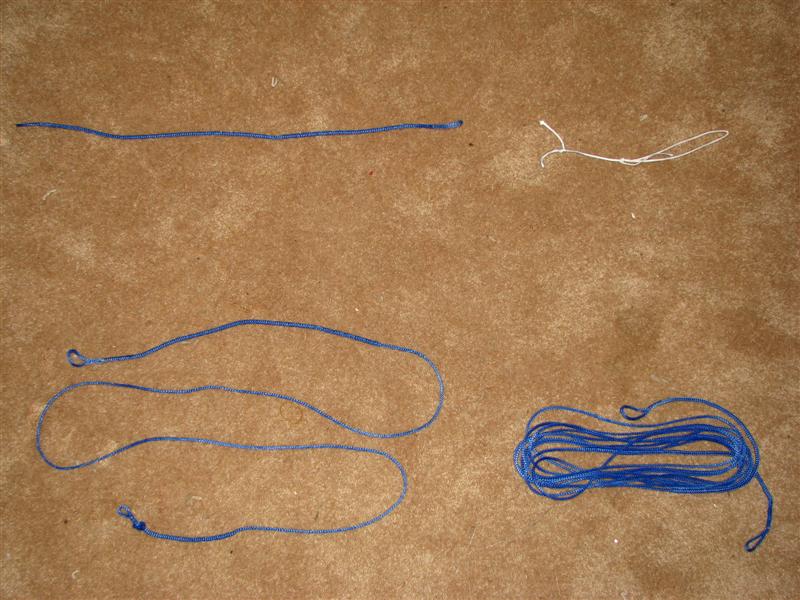
Notice that anything with appreciable mass is attached to something solid that will not be moved by the forces were dealing with. If you attach the mainline to the fusible link with something that has any real weight, you could easily kill somebody, even if theyre a long ways away. Clear the area, make sure nobody is anywhere nearby. The fusible link, tied in this manner, will brake somewhere around 450#. Start driving the truck slowly forward until there is tension on the line, just a little bit. No more than you could pull by hand. Secure the tow vehicle and go back and check that everything looks good. Get back in the truck and drive forward VERY slowly. Were doing two things here. First, were tightening the weave, or the braid, of the line. Second, were putting a permanent stretch in the spectra. Were also putting a big temporary stretch in the line too. You might be surprised how far you go before the line breaks. Dont rush it, take your time. Stop every foot or two; let the line stretch and the weave tighten. The fusible link will break, ideally at least several minutes after you started the stretch. Secure the tow vehicle and go back. The fusible link should have broken and the stop line should have stopped the main line from snapping back into a tangled mess. Disconnect the main line and repeat for the other main line. (Youll need a new fusible link.) Great, you now have two pre-stretched lines. Cut both in half right in the middle. You now have 4 lines with eyes at one end.
If youre making an equal length line set, attach the eyes of all 4 lines to one point. If youre making an unequal line set, attach the lines to your control bar. Run the lines out like you were tuning them. Mark all four lines at the length desired. Be extremely careful to mark them all precisely. This first mark is M1. Mark M2 and M3 as precisely as you possibly can. Length M1 to M2 and M2 to M3 must be identical on all four lines. This will ensure that all four lines are the correct length when done. Splice your eyes, but leave the end of the line sticking out of the mainline and dont lock-stitch the eyes. Tighten up the splices and recheck your line lengths. They should be identical. If theyre a little off, adjust the eye in or out as necessary to tune the lines. Lock-stitch and trim the end of the line.
Lastly, check that your safety system works freely. The lines should feed through without binding. DO NOT skip this step!!!
Youre done!
FAQ:
Q: Can I make the four lines and pre-stretch after the eyes are spliced at both ends?
A: Maybe. The lines will permanently stretch a foot or two. Its very possible that they wont be equal length after youre done. Each line may stretch just a bit differently.
Q: Cant I use super glue instead of Charkbait or Jerry Brown spectra adhesive?
A: Nope. Superglue wont adhere to spectra. It may seem like it does, but whats really happening is the glue is adhering to itself and tightening up around the fibers in the braid. Two ways to prove this. Superglue some spectra. Let it dry. Then roll the joint around and bend it. Pretty soon it just pops free. Or, try to superglue some Ziploc bags together. It doesnt even work a little bit. The bags and spectra are close enough chemically that glue will affect each in a similar fashion.
Q: Can I skip the lock-stitch and just use Jerry Brown Spectra Adhesive?
A: Maybe, but keep an eye on the eyes. It should hold; Ive tried it and had no problems. Im more comfortable with lock-stitching for the long term, but that might just be paranoia on my part. If the eye slips at all, dont use the line until you repair it. Remember, its not the glue or lock-stitch that provides strength; the splice does that. The lock-stitching just locks the eye when theres little or no tension on the splice.
Q: How strong are the splices?
A: They should be about 90% of line strength.
Q: Will I notice any difference in handling?
A: Possibly, especially with a kite that has high bar pressure. 800# stretches quite a bit less than 500# line, so more of your pull will go into turning the kite and less into stretching the line. You may notice a more direct feel. A kite with high bar pressure may feel like it turns with a bit less effort. Thats because it will. Since the line is stretching less, you put the same input into the kite at a lower tension. Will you notice the difference? I did with my T2 14m. Not a big change, but noticeable.
Q: My factory lines seem to go out of tune a lot, why is this?
A: Your lines probably werent pre-stretched sufficiently. Use the procedure here to pre-stretch them, but only if theyre un-damaged. If theyre frayed or damaged at all, pre-stretching may break them. Go ahead and make or buy a new line set. Also, pre-stretching your factory lines may put them wildly out of tune. Thats OK. Tune them up and they should stay in tune permanently.
Q: How do I tune my lines?
A: I covered this in another post.
Q: Ive got some of this 800# line; the weave looks pretty loose compared to factory lines.
A: Thats because its not been pre-stretched yet.
Q: Seems like theres a lot of waste. The directions have me using more line than I really need for a 20m line set.
A: True. You could cut down on the line used, but its easier to cut off line than to add it. I keep the extra line when Im done and mark it as pre-stretched. It comes in handy to make custom length pigtails to tune your bar.
Q: I have a set of lines that Id like to shorten. Can this be done?
A: Sure. Cut your lines a meter shorter than you want them. Splice on a piece of pre-stretched 800# spectra. Make the eyes like described here. Ill get a post done on splicing two lines together. Its pretty easy.
 |
| |
01 Fid - well used (Medium).jpg |
 |
| |
02 Fid insertion (Medium).jpg |
 |
| |
03 Fid Exit (Medium).jpg |
 |
| |
04 Hooking the line (Medium).jpg |
 |
| |
05 Pulling through 1 (Medium).jpg |
 |
| |
06 Pulling through 2 (Medium).jpg |
 |
| |
07 Pulling free (Medium).jpg |
 |
| |
08 Almost lined up (Medium).jpg |
 |
| |
09 Lined up eye (Medium).jpg |
 |
| |
10 Working out the line (Medium).jpg |
 |
| |
11 Finished eye (Medium).jpg |
 |
| |
12 Line Saver - Anchor line - Fusible link - Stop Line (Medium).jpg |
|
|
|
Nak
Since 19 May 2005
4335 Posts
Camas
Site Lackey
CGKA Member
|
| Fri Dec 19, 08 3:24 pm |
|
|
More pics:
 |
| |
13 Line Saver (Medium).jpg |
 |
| |
14 Fusible link (Medium).jpg |
 |
| |
15 Hooked up 1 (Medium).jpg |
 |
| |
16 Hooked up 2 (Medium).jpg |
 |
| |
17 Finished (Medium).jpg |
 |
| |
LockStitch (Medium).jpg |
|
|
|
kitezilla

Since 22 Jun 2006
453 Posts
gorge
Obsessed
|
| Fri Dec 19, 08 3:52 pm |
|
|
WOW!
Thanks for taking the time to thoroughly describe that procedure. It looks like you have covered all the bases, with adequate safety warnings, protocol, and technique. If I could get that line in red, green and white, I might trade in my Q Power lines for these. I wonder how UV resistant that spectra line is.
I love the way you made the fid.
|
|
|
Nak
Since 19 May 2005
4335 Posts
Camas
Site Lackey
CGKA Member
|
| Fri Dec 19, 08 4:03 pm |
|
|
| Thanks Kitezilla. I've been on the road for 2 weeks now; I had to do something! As far as colored lines, try a heavy duty sharpie marker. The color will wear off over time, nothing much sticks to spectra. But you can touch it up. Q-line color bleeds too... Q-line is spectra too I believe, so UV should be the same.
|
|
|
Kodiak

Since 01 Aug 2005
1114 Posts
Slidey
|
| Fri Dec 19, 08 4:24 pm |
|
|
SOmeone has too much time on their hands  Thanks for the well thought out and descriptive post! I may try this out the next time I need new lines. Thanks for the well thought out and descriptive post! I may try this out the next time I need new lines.
|
|
|
Blue

Since 03 Jul 2007
469 Posts
I used to be
Obsessed
|
| Fri Dec 19, 08 7:08 pm |
|
|
Great post Nak, thank you 
I am looking into getting my 9m to handle a bit more wind. It originally came with 22m lines. What would be an impact of having 18m lines on this kite?
Oh, and where do you get 800# Spectra?
_________________
just wear sunscreen |
|
|
jtrashy
Since 29 Mar 2008
53 Posts
Â
|
| Tue Jan 13, 09 10:47 am |
|
|
hey nak
i did my first splice tonight, great directions! a little tricky getting it to feed through the hole, but getting better at it.
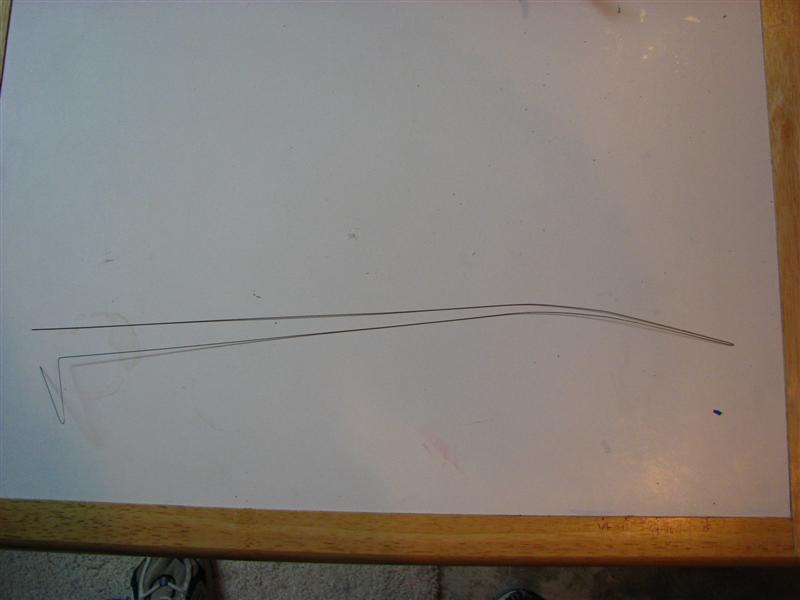
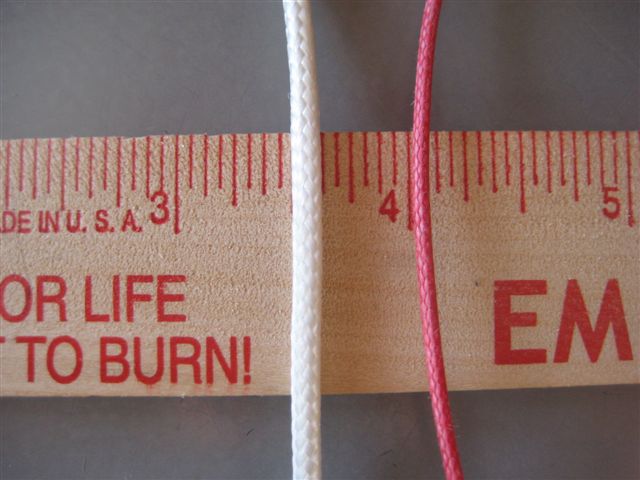
this stuff seems really thick, did i get the right stuff? its double the dia of my 08 lines(pic attached) just worried it might effect light wind days
since you have flown the lines, what do you think?
have you thought of using dental floss for the lock stitch? its knots easily and i think has a 40-50lb strength
thanks!
 |
| |
kite line dia.jpg |
|
|
|
surfboy1968

Since 17 Jun 2008
225 Posts
south padre island
Stoked
|
| Tue Jan 13, 09 11:09 am |
|
|
ha..........
Man I would rather spend 200 dollars 
|
|
|
Nak
Since 19 May 2005
4335 Posts
Camas
Site Lackey
CGKA Member
|
| Tue Jan 13, 09 1:50 pm |
|
|
| Blue wrote: | | where do you get 800# Spectra? |
Sorry I missed your question Blue! Jtrashy found this place, seems to be the cheapest around...
http://www.all-americanoutdoors.com/inc/sdetail/12588
| jtrashy wrote: |
this stuff seems really thick, did i get the right stuff? its double the dia of my 08 lines(pic attached) just worried it might effect light wind days
since you have flown the lines, what do you think?
have you thought of using dental floss for the lock stitch? its knots easily and i think has a 40-50lb strength
thanks! |
It'll tighten up and get thinner when you pre-stretch it. As far as it's effect on really light days, I can't say how much it would be... I didn't notice a difference with my T2 14m. It doesn't seem to slow down a REV, but for absolute low wind performance 600# might be better? It should be easy to measure the difference really. I'll have to set something up one of these days...
As far as the thread for the lock-stitch, anything that won't deteriorate and won't break really easy. Dental floss would probably work great, I just don't know if it will rot over time?
|
|
|
Nak
Since 19 May 2005
4335 Posts
Camas
Site Lackey
CGKA Member
|
| Tue Jan 13, 09 7:07 pm |
|
|
| surfboy1968 wrote: | ha..........
Man I would rather spend 200 dollars |
It sounds harder than it is... It really is pretty easy once you've done it once.
|
|
|
Mark

Since 20 Jun 2005
3679 Posts
I need my fix because I'm a
Naishaholic
|
| Tue Jan 13, 09 7:11 pm |
|
|
Was wondering if you could post a picture or two to show me how.....
Very nicely done.
_________________
Cleverly disguised as an adult...
www.naishkites.com |
|
|
jtrashy
Since 29 Mar 2008
53 Posts
Â
|
| Thu Jan 15, 09 5:59 pm |
|
|
hey nak
prep for 20m and 5m ext are complete. the splicing was a piece of cake.
i am now splicing the amsteel and having a very hard time. im doing it the exact same way and will not pull thru it self, it gets stuck half way. any tips?
when i prestretch the lines can i connect all of them together or just one at a time?
thanks!
|
|
|
jtrashy
Since 29 Mar 2008
53 Posts
Â
|
| Thu Jan 15, 09 6:30 pm |
|
|
instead of throwing all of it in the fireplace, as desired, i ate some food.
now that my sanity has returned, i found a trick for the amsteel. trim the tail that is being pulled thru and hooked by the wire so that the rope diameter is half. in other words trim parallel to the rope foe ~1/2-1/ inch decreasing the dia of the rope end. feed just this thru the wire = pull thru =
|
|
|
Nak
Since 19 May 2005
4335 Posts
Camas
Site Lackey
CGKA Member
|
| Thu Jan 15, 09 6:55 pm |
|
|
I don't see why you couldn't do all the lines together? I haven't tried it. The main problems I would see would be that you'd need a much larger area. Also, you're storing more energy in the line so be REALLY careful.
I use a different kind of fid on the amsteel, more of a standard fid. For 1/8" amsteel I use a 1/8" steel rod rounded on one end. I tape the rope to one end of the fid with blue painters tape. I then push the rounded end through the line. You can't use much tape or it'll be tough to feed it through...
|
|
|
kitezilla
Since 22 Jun 2006
453 Posts
gorge
Obsessed
|
| Fri Jan 16, 09 7:46 am |
|
|
You can buy some really nice fids from "Tow Me Up"...they are made from knitting needlles, which have been tapped at the cut-off end and threaded.
I have heard that Walmart sells knitting needles which are hollow, also, but haven't checked it out.
If you are going to tinker with spectra, you will have a lot more fun with nice-working, smooth fids.
Don't buy the conventional fid set for $30 though. They are too big for our needs.
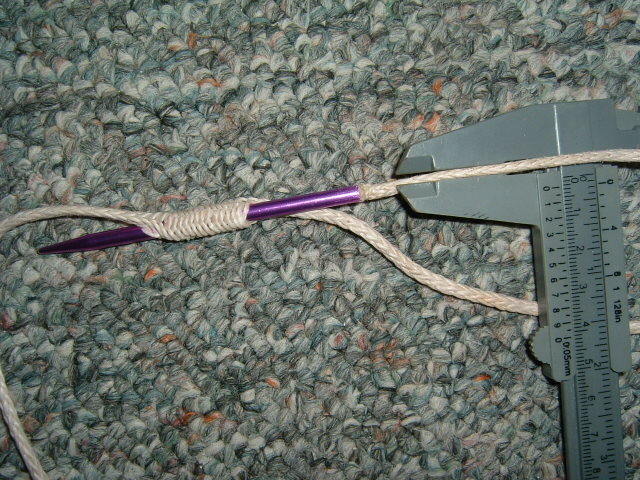
Here is a picture of the fids I am talking about. You screw the spectra in to the internal tapped threads:
 |
| |
purple fid for 2 mm spectra.JPG |
|
|
|
andrewbanandrew
Since 15 Jun 2009
7 Posts
New Member
|
| Thu Jul 09, 09 11:47 am |
|
|
So I did the math and it looks like Amsteel blue 7/64" (2.8mm) is pretty much the same cost as the Jerry Brown Line One 800# spectra (1.9mm). So if you're looking for something thicker and possibly easier to splice, check it out here: http://www.reddenmarine.com/site/item-details.cfm?id=AMRAMSTLBLU716
If you order a 600' spool (enough to make 8x22.86m lines, or two 22.86m four-line sets), it costs 15 cents per foot instead of 16.
Spools of Amsteel Blue can also be special ordered via Redden Marine or Fisheries Supply in the following colors:
-clear
-black
-silver
-red
-orange
-green
|
|
|
bwd

Since 04 Aug 2007
385 Posts
Obsessed
|
| Thu Jul 09, 09 1:06 pm |
|
|
7/64 is leader line thick, not flying line thick, way too heavy.
Plenty strong though....
|
|
|
|
|
You cannot post new topics in this forum
You cannot reply to topics in this forum
You cannot edit your posts in this forum
You cannot delete your posts in this forum
You cannot vote in polls in this forum
You can attach files in this forum
You can download files in this forum
|
|

